Prosthetic Balance: 10 Exercises to Dramatically Improve Your Balance
Editor’s Note: The “Prosthetic Balance” series is meant to address all the common issues you may encounter as a prosthetic-user. This is the first post in the series.
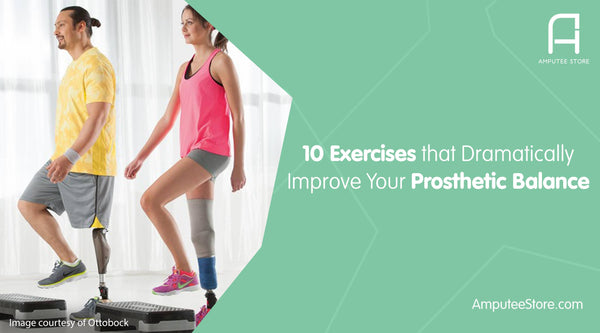
As a prosthetic user, working on improving your balance has benefits beyond merely preventing a fall. Improved prosthetic balance means a significant improvement in the quality of your walking, which lessens injuries and reduces lower back pain.
The first step towards improving your balance requires strengthening your core. This doesn’t mean you will only work on your abs. Instead, core work will take on a holistic approach of strengthening your core which includes your abs, lower back, and hip muscles.
After a few months of working on your balance, you will notice that every step you take with your prosthetic leg will be much stronger and more deliberate. We will talk more about exercises that will strengthen your core in the last section of this blog post; we will first discuss other moves that will also improve your balance.
1. Prosthetic Leg Balance
This move allows you to balance on your prosthetic leg. If you’re a beginner, make sure to have something to hold on to, like a stable chair or a handrail within arm’s reach.
Then, with your feet together, lift your sound side foot with the knee facing forward or to the side. Hold the position with eyes open (and fixed on one spot to maintain your balance). Next, hold the same position with eyes closed. Switch feet and repeat 4 times on each foot.
If any move feels wrong or unsafe for you, stop and check with your prosthetist or physician. Depending on your health and physical condition, some exercises may not be recommended.
2. Leg Swings
This move is excellent for warming up and stretching your hip muscles and hip joint. To start, stand on your right leg and raise the left leg at least 3-6 inches off the floor. Keep your arms at your sides while you swing your left leg forward and backward, touching the floor for balance. Make sure you keep your torso erect throughout the movement.
Next, increase the level of difficulty by repeating the move but without allowing your foot to touch the ground. Then, switch legs and repeat.
3. Prosthetic Leg Clock with Arms
To perform this move, envision a clock. To start, balance on your prosthetic leg. Keep your torso straight, your head up, and your hands on your hips. Point your arm straight overhead to 12 o' clock, then to the side at 3 o' clock, and then circle low and around to 9 o' clock without losing your balance.
Increase the level of difficulty by having someone else call out the different times to you and even switching it up. After you're done with your prosthetic leg, switch to the opposite arm and leg, and repeat.
4. Clock on an Unstable Surface
Once you're confident that you can balance on a stable surface, level up by trying the exercise moves on an unstable surface, such as a BOSU (Ballast Ball) platform. If you're a beginner, it's best to stand near a wall for safety.
Start in the middle of the board on 2 feet. When you feel comfortable, carefully execute the moves in Prosthetic Leg Clock. Trust us, it's a lot harder than it looks.
5. One-Legged Squat
The One-Legged Squat is famous for developing great balance, leg strength, flexibility, as well as coordination. To start, stand with your feet hip-width apart. Point your left foot out front--make sure your toes are just barely touching the floor--and push your hips back and down into a one-legged squat position. Your right knee should be bent, your chest upright, eyes in front of you, and your arms out front. Then, slowly push your right leg up into the starting position. Make sure to keep your knee relaxed and your back flat throughout the movement. Switch legs, and repeat.
6. Single-Leg Dead Lift
The Single-Leg Dead Lift works the hamstrings and the glutes. This move is excellent for challenging core stability and strength. To execute this move, you will need 5- to 10-pound weights.
First, balance on your sound side foot. Make sure that you engage the abs and bend forward at the hips while reaching out toward the ground with the hand opposite your balancing leg. Hold your weights and raise your other leg behind you for counterbalance.
As you return to the starting position, tighten your buttocks. Keep your knee relaxed and your back flat throughout the movement. Then, switch legs and repeat.
Core-Strengthening Moves
These core-strengthening moves can be done by anyone in spite of physical levels and with absolutely no equipment. The steps below are designed to strengthen your core muscles, including your abdominal muscles, back muscles, and the muscles around the pelvis. The result of doing these exercises correctly and regularly are strong core muscles that make it easier to do various physical activities.
You can perform these moves on a carpeted floor or mat. Remember to breathe freely and deeply during each core-strength exercise. Focus on tightening your deepest abdominal muscle—the one you feel contracting whenever you cough.
7. Hollowman
The Hollowman, or the Hollow Body Hold, is one of the first moves taught to gymnasts. This exercise allows you to brace your abs and create the right tension in the body that is integral to maintaining your balance.
Start by lying flat on your back, and contract your abs by pulling the belly button towards the floor. Hold your arms and legs straight out from the body with your hands and toes pointed. Slowly raise your legs and shoulders from the ground. Keep your lower back in full contact with the floor. Hold this position for a few counts, then release.
8. Plank
The plank is proven to have a dramatic impact on your gait when done every day. This simple exercise effectively contracts all layers of the abdominal fascia, which does not only strengthen the core but also reduce lower back pain.
Begin on the floor on your hands and knees. Lower your forearms to the floor. Make sure your elbows are positioned under your shoulders. Step your feet back one at a time. Maintain a straight line from the heels to the top of your head. Then, tighten your abs and hold.
9. Bridge
While this move has long been considered beneficial for your glutes, the bridge also works wonders for your core. Tuck your hips under and engage your lower abdominals.
First, lie on your back with your hands by your sides, knees bent and feet flat on the floor. Raise your hips, creating a line from your knees to your shoulders. To successfully execute this move, make sure to tighten your abdominal and buttock muscles when you raise your hips. Hold this pose for 30 seconds. Work your way up to 10 repetitions.
10. Superman Pull
Many prosthetic users suffer from low back pain because their core is weak. This is assuming that their socket flexion alignment is accurate. The Superman Pull is designed to target the lower back specifically.
Begin by lying down on your stomach, with your arms and legs outstretched. Then pull your upper torso and legs up and away from the floor. Make sure to keep your shoulders down and away from the ears. Squeeze your abs, back muscles, and glutes to keep your arms and legs off the floor. Hold this position for a few seconds then release.
If this variation is too complicated, skip the “pull” part of this move and just practice raising your arms and legs off the ground.
In Summary
An improved balance will create a stronger version of yourself, even possibly freeing you from lower back pain which lessens the chance of serious injury in case you do fall. Within months you'll notice a dramatic improvement in your overall walking. So, perform these 10 exercises regularly to improve your prosthetic balance.
Watch out for our next prosthetic balance article, which will focus on stretching exercises.
Which exercises do you perform to improve your balance? Please comment below if you need clarification of any of the exercises mentioned above.

